Hedge trimmers are brilliant garden tools that make our lives very much easier. While a trusty set of garden shears can be useful at times, nobody wants to use them to tackle a hedge that’s 30ft long and 6ft high!
To get the best out of them, they need regular care and attention, and that means keeping the blades clean as well.
There are several ways to go about this, and you might not be sure which is best. If so, take a look at this guide for some friendly and helpful advice on how to clean hedge trimmer blades.
Why Do I Need To Clean My Hedge Trimmer Blades?
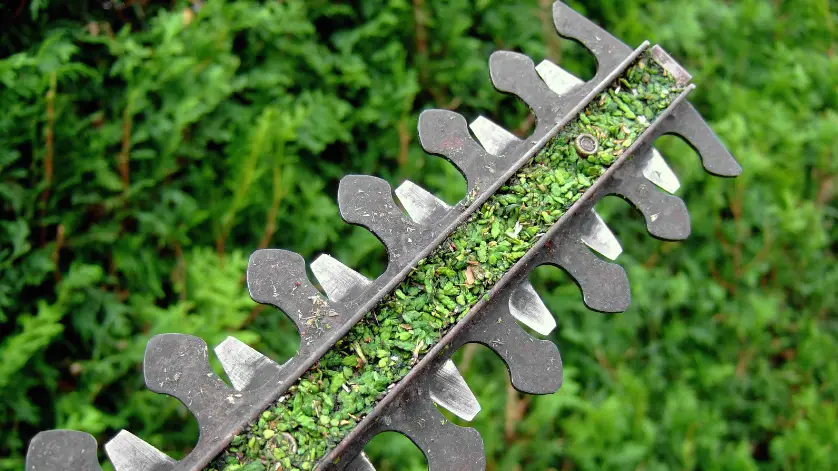
When you slice through leaves, plants, twigs and small branches, they release sap and resin that sticks to the blades. This attracts plant residue, dust and dirt, creating a sticky paste that sets hard and is difficult to remove.
It may be worse, depending on what hedges and shrubs you have in your garden. Evergreens tend to be worse, as they produce a lot of sap and resin. If this isn’t cleaned off regularly it can affect the trimmer’s efficiency as it slows down the blades. This increases resistance and friction, causing the motor to overheat.
Time To Get A New Hedge Trimmer?
Eventually, it will be so bad that you’ll need to replace the blades, or maybe even get a new hedge trimmer.
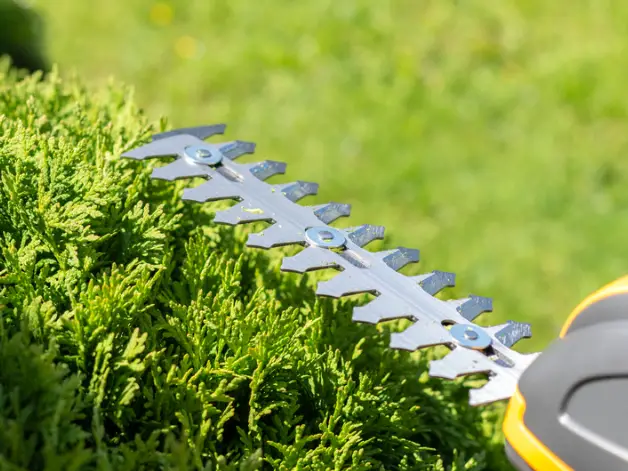
Clean, sharp blades create a crisp, neat finish to your hedges, so it’s in your best interests financially and aesthetically to keep those blades clean!
Safety Measures Before You Begin
Yes, it’s dull and boring, but do take note of health & safety advice as it may save you a trip to A&E carrying your own fingers in a bag of ice.
You need to ensure that there is no chance of your hedge trimmer firing up while you are cleaning the blades. Even when they’re not in motion, they can inflict a serious injury. And when they are in operation, you seriously might lose a finger or two.
Always Disconnect The Machine!
This means that it’s essential to disconnect the machine from its power source.
So, if you have a petrol hedge trimmer, remove the spark plug. If it’s an electric hedge trimmer, make sure it is unplugged. Finally, if you have a cordless hedge trimmer, remove the battery and keep it in a secure place.
What You’ll Need
You may not need all of these, but here’s a list of things that could be handy, so check you have access to them before you start:
- Lubricant oil
- A stiff brush
- A tub of soapy water
- Industrial degreaser
- Bleach and water solution
- Rubbing alcohol/White spirits
- A clean dry cloth
- Safety gloves
If you have a compressed air machine you’re onto a winner, as this is a great way of cleaning hedge trimmer blades! However, not everyone has one of these, so I’ll suggest a few ways of cleaning those blades using the collection of items listed above.
Step One
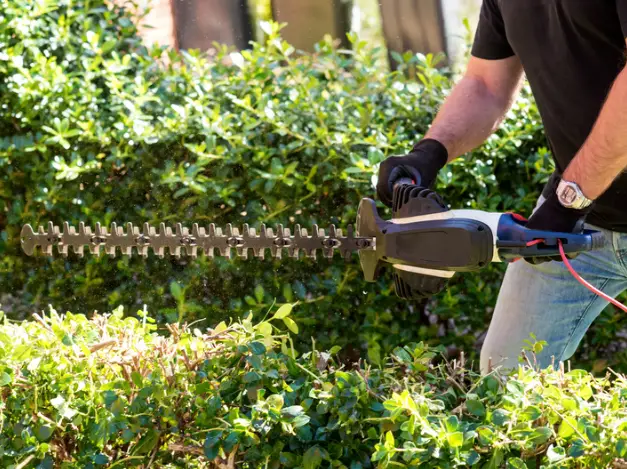
Put the hedge trimmer on a level surface, preferably outdoors or in a well-ventilated area where it won’t present a hazard to others (especially small children).
Rub the machine over (not just the blades) with a stiff-bristled brush to get rid of loose dirt and debris. Remember to use a good pair of safety gloves while doing this, as it’s very easy to cut yourself on those teeth! Even dull blades can slice your fingers.
Remove The Blades
If possible, remove the blades to allow access to both sides, and make sure to scrub these well.
Most hedge trimmers have reciprocating dual-action blades, meaning that the cutting edge is on both sides of the blade, although you can buy trimmers that only cut from one side. Some models have one blade fixed in place while the other slides up and down to create a cutting motion. Others have two moving blades that move against each other, and these make for a more efficient cutting tool. They also help to reduce vibration.
Depending on the model and brand, you should be able to remove the blades fairly easily, maybe even without having to use tools.
Top Tip: Take Special Care With An Electric Hedge Trimmer
This applies to corded electric hedge trimmers more than battery-powered models, but it’s still wise to take this advice for both: always make sure that no water gets inside the machine. As I mentioned, it’s best to remove the blades for cleaning, as you can ensure that they are completely dry before reattaching them. If water comes into contact with electrical components it could cause an electric shock and maybe break the machine.
Step Two
If you’re lucky, you might get away with wiping down the blades just using soap and water!
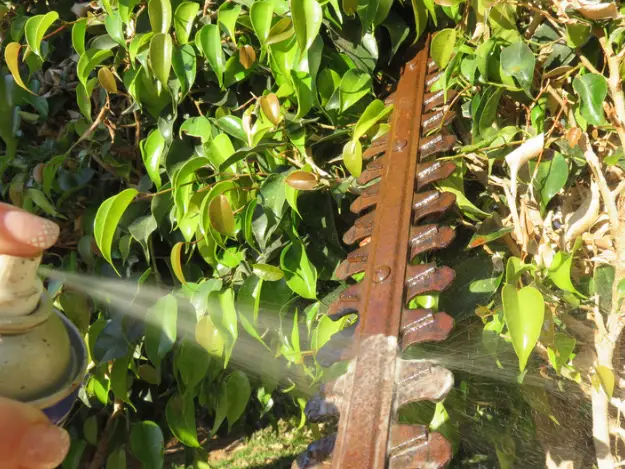
However, if they are heavily gunked up, it might be wise to soak them in a tub for an hour or so. You can do this using a degreaser, bleach, white spirits or rubbing alcohol (isopropyl alcohol). Please, please do not ever mix these cleaning solutions. They will create toxic fumes that can be extremely hazardous.
Choose one, and if it isn’t successful you can try another after rinsing the blades thoroughly.
Also, you might be tempted to use other chemicals to clean the blades, but this is rarely a good idea. Some chemicals are highly corrosive and may damage the surface of the blade. Anything containing a large amount of lye (sodium hydroxide, also called caustic soda) can be dangerous as it reacts violently when it comes into contact with aluminium. Although most hedge trimmer blades are made of steel, some are made from aluminium alloy.
Instead of soaking them, you might want to use a rag and rub them down using white spirits or rubbing alcohol. This usually works a treat, but once again, don’t mix the liquids, just pick one that you think will do the trick. Use a gentle rubbing action to shift the dirt, rinsing out the cloth as necessary.
Step Three
This step is just as important as cleaning your hedge trimmer blades. Once you’ve finished, it’s essential that you rinse and dry the clean blades before adding a lubricant.
If you neglect this step, the blades may rust while being stored. Also, without lubrication, there’s more friction, and this will not only wear the teeth down but will also result in overheating.
WD-40 is often used for lubricating electric hedge trimmer blades, but your manual (see below!) or manufacturer’s website will advise you as to the best one to use. Some sources state that WD-40 is harmful to plants, although whether this is true or not is difficult to establish. Personally, I can’t see how it would be any more or less harmful than other lubricants.
Step Four
If you did remove the blades, it’s time to fit them back in place securely.
Most leading brands provide a sturdy blade sheath to prevent injury and protect the teeth from being blunted while the machine is stored.
If you don’t have one of these, it’s worth investing in a suitable blade cover. Some can be mounted on the wall, which is great for saving space and keeping the unit out of harm’s way. Others have a blade tip protector with a hanging eye, which is equally as handy.
Top Tip: Read The User Manual!
Without wanting to reinforce stereotypes, it’s well known that many men (but by no means all!) regard the manual that comes with any tool or appliance as unnecessary and irrelevant. However, it may contain helpful information about the machine, including how to maintain it properly. There might even be advice about cleaning the blades or tips on special products that will keep your trimmer running smoothly.
Cleaning Rusty Blades
If you find that your blades have rusted a little while being stored, spray or wipe a light coating of mineral oil (or WD-40) over them and leave for about twenty minutes.
Next, scrub them gently with some fine-grade steel wool, scrubbing pad or wire brush, then wipe them down again with a damp cloth to remove any residue.
Alternatively, soak them overnight in a 50/50 solution of distilled white vinegar and water. Some people use a mixture of lemon juice or white vinegar (a half-cup) and salt which they spread over the blades and leave until the salt has hardened. The mixture is then washed off and the blades are dried with a cloth.
Finally, always remember to lubricate the blades well before storing the hedge trimmer again.
Cleaning Hedge Trimmer Blades With Compressed Air
Compressed air machines come in various sizes, ranging from around £30 up to £300 or more. If you have one handy, great! If not, then you could consider getting one if your budget allows – not that you’ll need a heavy-duty machine for this job. A £30 job will do nicely.
Although you can buy compressed air in an aerosol can, they are probably more suited to other tasks, such as cleaning computer keyboards etc. However, you only need gentle compressed air to clean hedge trimmer blades, so it may be worth a try.
Safety Eyewear!
Lay the blades flat and wear safety glasses to prevent debris from blowing back into your face – the last thing you need is an eye injury! Even though it doesn’t need to be a high-powered blast of air, it still sends little pieces of dirt flying.
Using a low setting, run the nozzle over the blade slowly to remove the build-up of stubborn dirt. It’s very satisfying to see the dirt flying off, revealing the clean metal beneath. Incidentally, this is a job that’s best done outdoors or maybe in a shed or workshop; you don’t want this gunk stuck to your kitchen cupboards or living room wall.
When you’re happy that all the dirt has gone, wipe the blades down and add oil or a suitable lubricant.
Establish A Regular Hedge Trimmer Maintenance Routine
It’s a good idea to get into the habit of checking and maintaining your power tools regularly, including your hedge trimmer. Like any other power tool, proper maintenance ensures that it will last longer and perform well.
After you’ve used the trimmer, wipe the blades down with a damp cloth to remove the worst of the sap. If it proves to be stubborn, wipe it with soapy water. Larger pieces of debris can be shifted using a stiff brush.
Dry the blades with a cloth and coat them with suitable lubricant oil to prevent rust.
Top Tip: Don’t Just Clean The Blades!
Although it’s essential to keep those blades sharp and clean, the rest of the machine needs attention as well if you want it to last. Poor maintenance leads to poor performance and, eventually, a broken hedge trimmer.
During a maintenance session, check for loose screws and tighten them up. Vibrations cause screws and bolts to loosen over time, and these can affect the machine’s performance if they fall out completely.
On petrol-powered machines, check the air filter, as this might need cleaning or replacing. A dirty or blocked air filter will cause the engine to overheat as the air can’t flow freely and cool the engine down.
Take a good look at the handle grips, as most these days are made of soft rubber that can become damaged. This might affect your hold on the machine as you are using it, which could present a hazard. Many of these machines include a safety trigger in one or both handles that switches off the machine when you let go.
If either of these is damaged, it could lead to an accident.
Sharp Trimmer Blades?
Check the cutting blades over to see how sharp they are. Blunt or bent teeth won’t cut efficiently and will leave your hedges looking ragged and unsightly. They may also damage the machine in the long term. Get the blades sharpened if necessary, or you may wish to do this yourself if you have the right tools.
How To Clean Hedge Trimmer Blades: A Few Final Thoughts
Cleaning your hedge trimmer blades frequently will keep them in good condition and reduce the need to have them sharpened.
And getting into the habit of wiping down your hedge trimmer with a simple soap and water solution each time you use it, as well as setting aside a few minutes to maintain the machine properly once in a while, will ensure that it lasts for many seasons.
I’ve looked at a few ways of cleaning hedge trimmer blades, and it seems that much of it comes down to common sense. As many people have pointed out before now, if you look after your tools, your tools look after you.
We all want to get the very best use out of our garden power tools, and in these times of financial uncertainty, it’s even more important to reduce costs as far as possible.
So, with this in mind, the tips I’ve offered here might save you from having to spend a lot of money. Alternatively, you could ignore them and the gunk that’s accumulating on your hedge trimmer blades.
And when your hedge trimmer suddenly breaks down, you’ll have to consider buying a new set.
Either that or you could invest in a pair of hedge shears.
